
 Price Match Guarantee
 Free Shipping


Rhino-Rack US Conduit Locking End Cap Assembly - LSE102

This wheel on real customer builds
See this part on video
Made by our team · tap a video to play it

📧 Get Fitment Help
Verify parts fit & get product recommendations
Rhino-Rack
SKU:
RHRLSE102
|
- UPC:
- 9321911289164
$109.99
Other Rhino-Rack kits for this car
Fits these vehicles
Fitment not listed for this part yet — call or text 813-535-5801 and we will confirm it for your car.
Part details
- Part number
- RHRLSE102
- Manufacturer part number
- LSE102
- UPC
- 9321911289164
- Brand
- Rhino-Rack
- Part type
- Hardware - Singles
- Prop 65
- ⚠️ WARNING: This product can expose you to chemicals which are known to the State of California to cause cancer. For more information, go to www.P65Warnings.ca.gov
- Special order
- Yes — ordered in for you; allow extra time
- Instructions
- Installation instructions (PDF)
Installation guide (from Rhino-Rack)
Hosted by Rhino-Rack. Follow the maker's instructions and torque specs.
- Box size:
- 5.90 × 5.10 × 10.60 (in)
Finance it — pay over time
 Bad credit or no credit? No problem. Lease-to-own with Snap Finance: no credit needed, approvals up to $5,000, as low as /week. Get started
Low monthly payments
Affirm, Klarna or PayPal Pay Later: see your exact plan at checkout. Checking won’t affect your credit score.
Bad credit or no credit? No problem. Lease-to-own with Snap Finance: no credit needed, approvals up to $5,000, as low as /week. Get started
- Affirm
- Klarna
- PayPal Pay Later
- Snap Finance
📧 Get Fitment Help
Verify parts fit & get product recommendations
Complete the job
Read before you buy


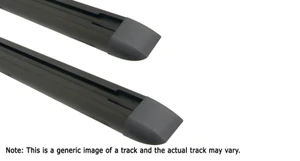
Rhino-Rack has designed a new conduit locking end cap that is a game changer. This end cap was designed to provide maximum security with our built in Masterkey compatible steel locks. The cover plate Includesdes high quality internal seals to keep your contents dry and protected using high impact materials. The LSE102 comes as a set and is made to suit Schedule 40 PVC pipes (3.9). Apart from the simple twist and lift operation to open the end cap, the internal sleeve sits flush with the conduit pipe to Minimize the chance of your contents from catching the lip at the join.
Rhino-Rack Conduit Locking End Caps for Schedule 40 PVC Pipes
US CONDUIT END CAP ASSEMBLY
- Clearance Item:
- N
- LTL:
- N
- MPN:
- LSE102
- Proposition 65:
- Y
- Special Order:
- Y
PRODUCT REVIEWS (0)
Overall Rankings
Have you tried this product?
WRITE A REVIEWNo reviews for this product yet. Be the first to write a review!
Write a Review

Rhino-Rack
Rhino-Rack US Conduit Locking End Cap Assembly - LSE102
Rhino-Rack US Conduit Locking End Cap Assembly - LSE102 FAQ
The maker's installation guide is on this page — see Installation guide under the part details for the step-by-step and the torque figures. Work on level ground with the car properly supported, and torque every fastener to the maker's figure. If the job is beyond your tools, any shop that does this kind of work can fit it.
What's in the box above lists what the maker includes when we have it, and the maker's guide names any tools or extra parts.
Many parts are bolt-on jobs with hand tools; the maker's guide on this page shows the steps and the torque figures. If it is beyond your tools, a shop can fit it.
Check the vehicle list above against your exact year and trim before ordering. If something is off, call or text us at 813-535-5801 and we will sort it out.
Yes — monthly options show right under the Add to Cart button. Affirm, Klarna, PayPal Pay Later and Snap Finance are offered at checkout, and checking what you qualify for does not affect your credit score.
Install and care: Hardware - Singles
- Before you start, read the maker's guide on this page end to end and lay out every part against the What's in the box list.
- Do torque every fastener to the maker's figure with a torque wrench, and re-check it after the first drive.
- Don't force a part that does not line up: check the vehicle list on this page against your exact year and trim first.